Not too long ago, I was tasked with migrating a legacy IIS 6.0 instance in order to retire a Windows Server 2003 VM. This old, crusty web server is riddled with mostly ASP Classic pages that the company never pulled the trigger on either retiring or rebuilding in a newer environment. So yay me! for getting the opportunity to move it all and make sure it still works. We have since reduced our dependency on it, but it is still needed to process work from the older system.
Setting up IIS on Server 2016 Core
For this lift and shift, I spun up a fresh Windows Server 2016 Core VM to be the new home for this IIS instance. Once I had the new server up and running with an IP, joined to the domain, you know…all that jazz, I could get to the fun stuff. I needed to install IIS, so not having a GUI, this needed to be done with PowerShell:
Install-WindowsFeature -Name Web-Server -IncludeManagementTools
I found that adding the proper management tools would not “stick” until after the server was rebooted.
Once it was back up, I installed the needed managemnt tools so that I (or anyone else on our team) could manage IIS from their Windows 10 workstation. To do that I had to start by changing one registry key:
Find the HKEY_LOCAL_MACHINE\SOFTWARE\Microsoft\WebManagement\Server key and change the EnableRemoteManagement value to 1
The following commands will install WMSVC (Web Management Service) and set it to start automatically, as by dfeault, it is set to manual startup. I also had to start the service.
Install-WindowsFeature Web-Mgmt-Service
Set-Service -Name WMSVC -StartupType Automatic
Start-Service WMSVC
This will prepare your now new IIS instance to be managed from your Windows 10 workstation. Now, let’s talk about migrating IIS…
Migrate IIS using the Web Deployment Tool
A BIG thanks to Microsoft’s documentation on this tool and how it is used. It was all I needed to migrate all the apps, sites, etc. from the old to the new. I’ll walk through the steps I completed for my migration, but yours may be more complex depending on your configuration.
I had to download and install the latest Web Deploy installer. I installed this on both the old and new servers. The .msi will install just fine on the core OS, you will see a GUI wizard. I used the Complete installation option. You will be given the choice of Typical, Custom, and Complete. It’s a small footprint, so I went with Complete. You can find more information on installation options here.
Once installed on each server, it is suggested to run the following command to see what dependencies may be needed on the new server. In other words, there might be components on the old server that need installed on the new one that are not a part of the default IIS installation. We will get to all those soon. You’ll need to run this command in a command prompt window even on the old GUI server from the folder the new Web Deploy Tool is at. For me it was: C:\Program Files\IIS\Microsoft Web Deploy V3 on the old, and C:\Program Files (x86)\IIS\Microsoft Web Deploy V3 on the new. For this scenario, I’m moving from IIS 6.0 to 10.0.
msdeploy -verb:getDependencies -source:metakey=lm/w3svc/1
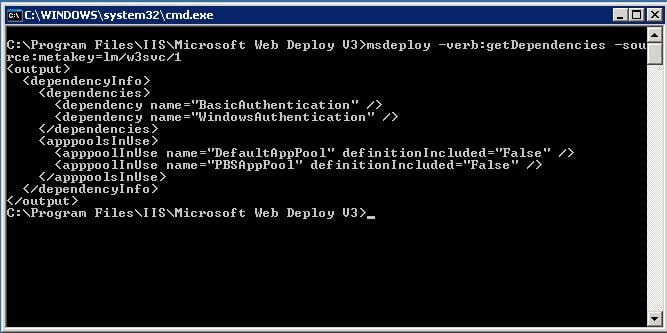
As you can see, there was minimal dependencies that are needed. To be honest, knowing my environment, they really aren’t needed…BUT I’ll make sure they are installed anyway just in case. On the new server to install BasicAuthentication and WindowsAuthentication, it’s just a few simple PowerShell commands:
Enable-WindowsOptionalFeature -Online -FeatureName IIS-BasicAuthentication
Enable-WindowsOptionalFeature -Online -FeatureName IIS-WindowsAuthentication
As far as the few AppPools, really just one, bceause the DefaultAppPool will already be there…I cheated and just created the AppPool manually on the new. You can syncronize all your AppPools with the Web Deploy Tool if you had a lot to deal with. Check that out here. When it comes to actually migrating your sites and files, you have two options: manually package them up and ‘import’ them or do a live sync in which the files get streamed to the new server. I chose to package the files up. This will create a nice .zip file that I copy over to the new server and import. To create the package:
msdeploy -verb:sync -source:metakey=lm/w3svc/1 -dest:package=c:\geeklifenowsite.zip > WebDeployPackage.log
When the command is complete, you can then just move the file to your new server and import. Feel free use the -whatif parameter to see how the import would do:
msdeploy -verb:sync -source:package=c:\geeklifenowsite.zip -dest:metakey=lm/w3svc/1 -whatif > TestWebDeploySync.log
If you are ready to import, then run the command without -what if:
msdeploy -verb:sync -source:package=c:\geeklifenowsite.zip -dest:metakey=lm/w3svc/1 > WebDeploySync.log
This will extract all the files and folder structures from the old server’s C:\inetpub\wwwroot and mirror it on the new. At this point, the migration is completed.
Installing IIS Components via PowerShell
After the migration, I found that I had to install quite a bit of IIS components that the pages needed in order to function. Here is the comprehensive list of what I had to install, all as separate PowerShell commands. I had to somewhat follow this in the order listed, as some of the compnents toward the end of the list depend on stuff toward the top in order to be installed. Keep in mind that earlier I installed BasicAuthentication and WindowsAuthentication earlier before the migration as a part of staging dependencies. Microsoft will actually suggest not installing ASP Claassic, which unfortunately I had to for most of the pages to work. The last command on the list installs ASP Classic. You can get a listing of all the available features by running in PowerShell:
Get-WindowsOptionalFeature -Online | Where {$_.FeatureName -like 'IIS*'}_
Here is what I ran for my scenario:
Enable-WindowsOptionalFeature -Online -FeatureName IIS-HttpRedirect
Enable-WindowsOptionalFeature -Online -FeatureName IIS-ApplicationDevelopment
Enable-WindowsOptionalFeature -online -FeatureName NetFx4Extended-ASPNET45
Enable-WindowsOptionalFeature -Online -FeatureName IIS-NetFxExtensibility45
Enable-WindowsOptionalFeature -Online -FeatureName IIS-LoggingLibraries
Enable-WindowsOptionalFeature -Online -FeatureName IIS-RequestMonitor
Enable-WindowsOptionalFeature -Online -FeatureName IIS-HttpTracing
Enable-WindowsOptionalFeature -Online -FeatureName IIS-IIS6ManagementCompatibility
Enable-WindowsOptionalFeature -Online -FeatureName IIS-Metabase
Enable-WindowsOptionalFeature -Online -FeatureName IIS-WebSockets
Enable-WindowsOptionalFeature -Online -FeatureName IIS-ApplicationInit
Enable-WindowsOptionalFeature -Online -FeatureName IIS-ISAPIExtensions
Enable-WindowsOptionalFeature -Online -FeatureName IIS-ISAPIFilter
Enable-WindowsOptionalFeature -Online -FeatureName IIS-ASPNET45
Enable-WindowsOptionalFeature -Online -FeatureName IIS-ASP
Manage IIS from Windows 10
Now that IIS is up and running on my new server core OS with no GUI, my team and I need a way to manage it from our desktops. There’s just a few simple things left to do to connect to the instance, any many others if you have multiple IIS instances to manage.
Now this is where things get a little muddy, thanks to Microsoft. There was a shift in remote management tools with the release of 1809 last year. What most of us sysadmins remeber as the RSAT tools that you installed as a single .msi, those days are now gone. With the release of 1809, came the option to install individual RSAT tools as you need them depending on your role/function. If you are running 1803 or erlier, you will need to install the RSAT tools found here.
If you are running version 1809 you would install the RSAT tools in a few different ways:
-
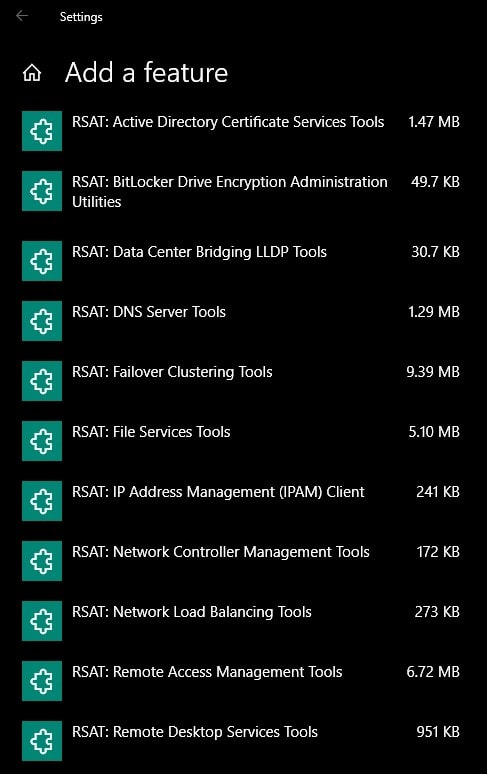
In Windows 10 Settings, find/search for Manage optional features and select Add a feature. You then can scroll down the list (alphabetical) until you come to all the ‘RSAT’ components.
-
You can also install the features using DISM commands. In order to use DISM to install these components, you need to make a quick change in the local group policy to allow the features to be installed via DISM.
I went the geeky route with using DISM:
- Open up the local group policy editor. Run > gpedit.msc
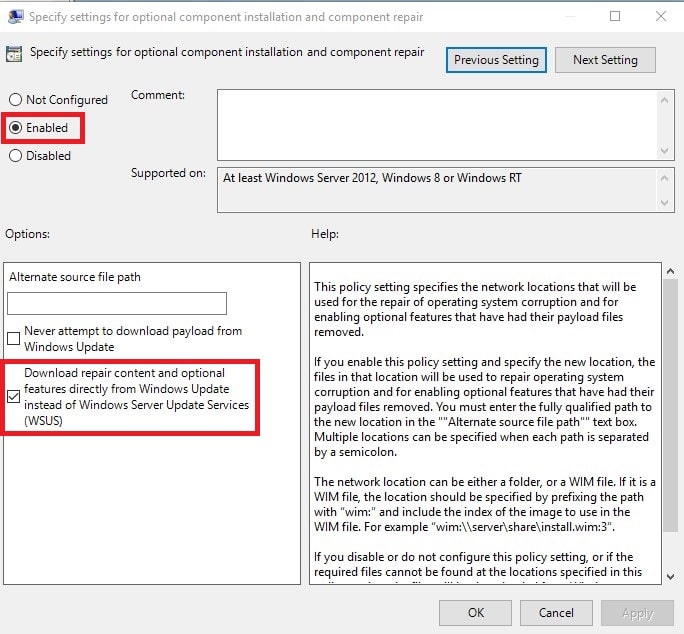
- Navigate to Computer Configuration > Administrative Templates > System > Specify settings for optional component installation and component repair
-
Set it to Enabled with the option Download reapir content…blah blah blah…(WSUS) checked. I believe there is also a way to modify this via the registry as well.
- Install all the features! You can get a list of all available features via a PowerShell command:
Get-WindowsCapability -Online | Where {$_.Name -like 'RSAT*'} - For instance, to install DHCP management:
DISM.exe /Online /add-capability /CapabilityName:Rsat.DHCP.Tools~~~~0.0.1.0
Remember when I mentioned that Microsoft makes this process a little muddy? Well, to remotely manage IIS servers…you have to do something completely different! So all this RSAT nonsense is just a bonus!
Now to really setup for remote IIS management
- Head to Programs and Fetaures: Run > appwiz.cpl
- Click Turn Windows features on or off in the left pane.
- Find and check: Internet Information Services > Web Management Tools > IIS Management Console
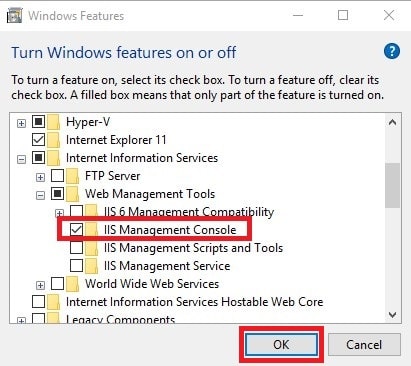
- You will be prompted to reboot for this to function.
- After rebooting, download and install IIS Manager for Remote Administration 1.2
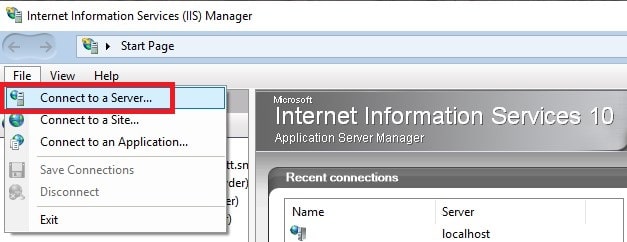
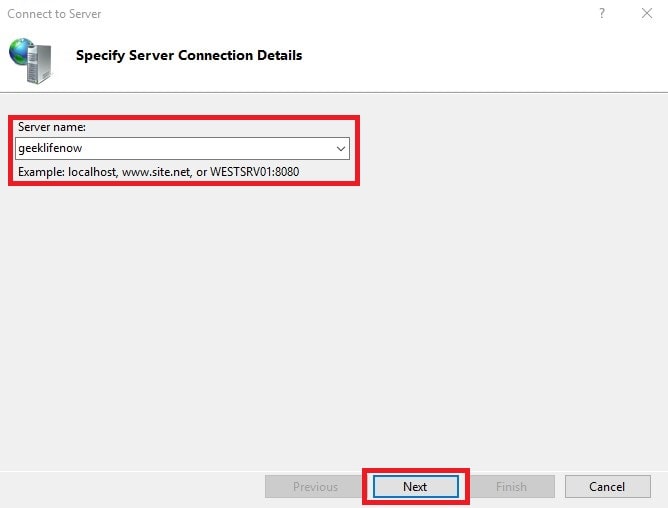
Without step 5, you will only see your local IIS instance in IIS Manager. Once you install this, you then will have the option to connect to remote servers to manage IIS. Just simply click File > Connect to a Server and a wizard will guide you through the process to add remote servers.
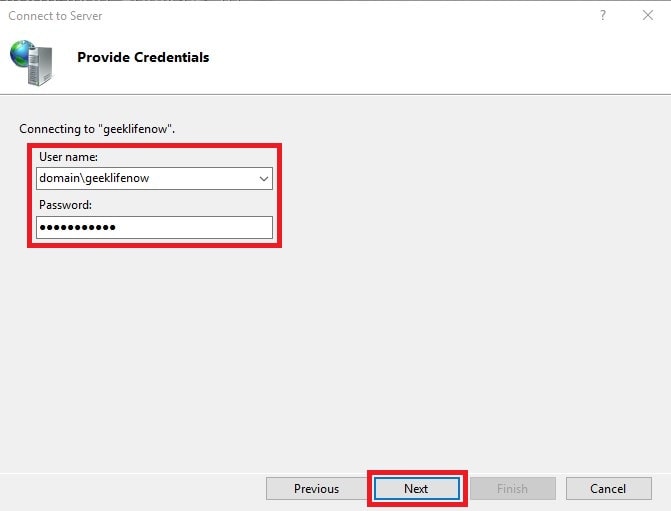
If you have not set up local certificates, you will be prompted with a security warning. Just click Connect anyway.

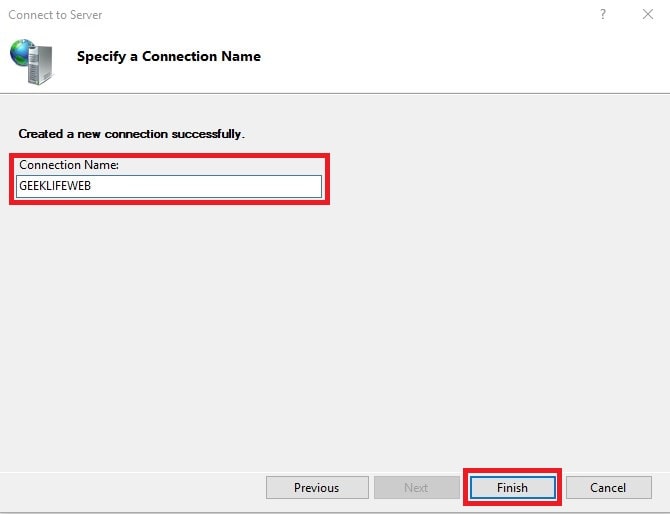
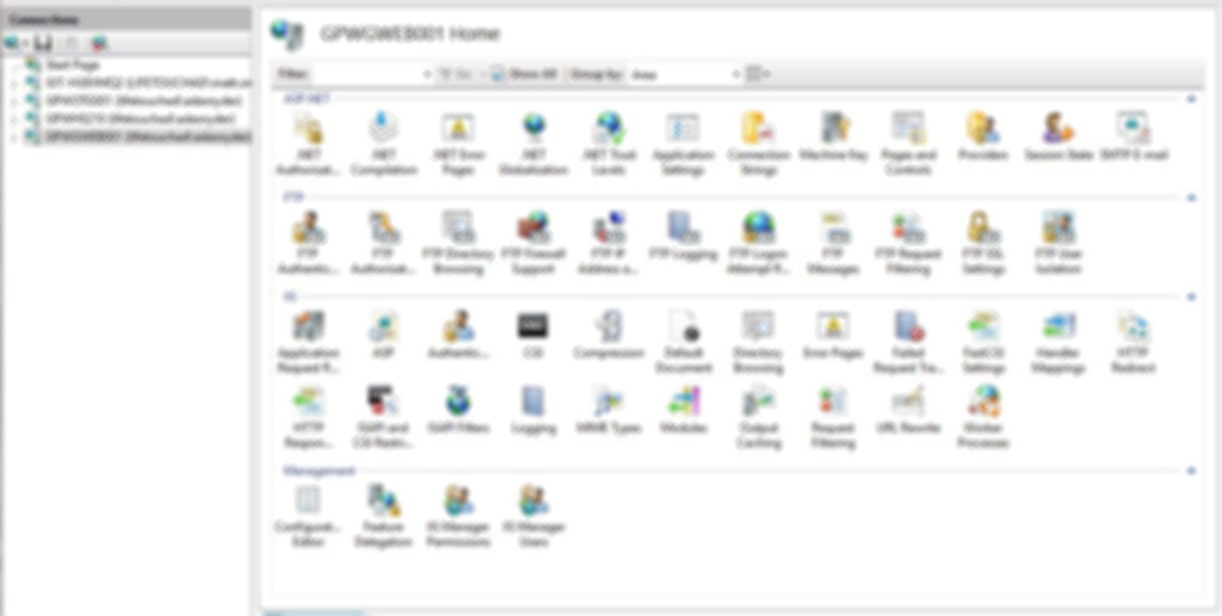
Give your remote connection a logical name in your IIS Manager listing:
You will now see a much more familiar IIS management look and feel, all from the comfort of your own workstation without having to RDP to the server to get the same functions.
Now you can manage all the IISs!